By default the program is not tied to a particular detector layout.
When starting the program, you have to go in the top "setups" item in the gui main panel to choose for a particular detector setup. The 2.0.0 comes with the four setups:neard, fard, fgd, fgd_hit. When choosing one, three dedicated scripts are copied from the "resource" directory (the "res" dir) of the distribution/installation into your application documents directory (your "doc" dir). For desktops, your application documents directory is under (see also "softinex/Apps and data files"):
    Linux, macOS, Windows-10/CYGWIN: ~/Documents/EsbRootView
    Windows-10/DOS: C:\Users\<your account name>\Documents\EsbRootView
On Windows, you can have two packings/builds: the vc++/win32 one that must be started from a DOS prompt (or with the mouse) and that has the upper Windows/DOS documents directory, but also a g++/X11 one built from a CYGWIN environment that must be run from a CYGWIN prompt and that has the upper Windows/CYGWIN document directory (which is not the same as the Windows/DOS one!). Note that if the document directory does not exist, the application will (attempt to) create it.
When choosing a setup, for example neard, three files are copied from the resource directory to your doc dir:
    res_dir/neard_startup.insh => doc_dir/startup.insh
    res_dir/neard_event.insh   => doc_dir/event.insh
    res_dir/neard_anim.insh    => doc_dir/anim.insh
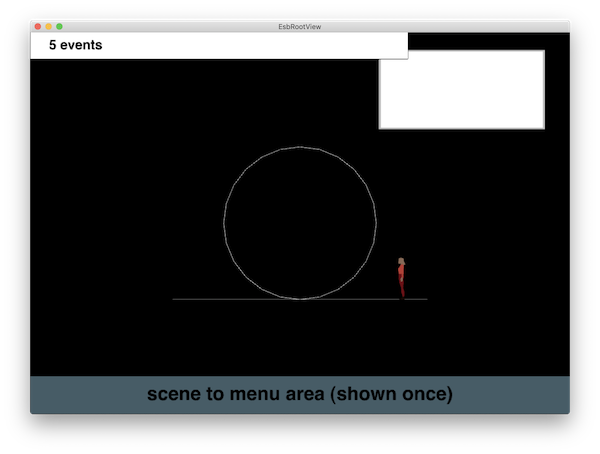
After having done theses copies, EsbRootView executes the startup.insh script. In it there are instructions to load a dedicated geometry (root) file found in the res dir, create a scene graph of the detector deposited in the "static scene graph", do a camera setup adapted to the detector layout, load an avatar ("sarah") to give a hint of the scale of the scene and switch from GUI mode to the scene mode. With the neard startup.insh script, you should see:
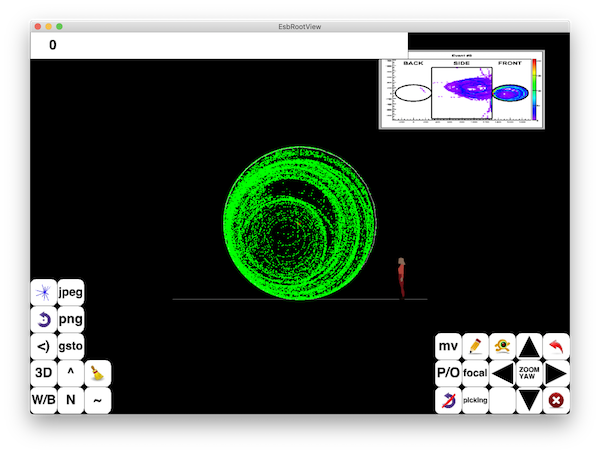
When doing a "next event", the event.insh script is executed. The default script for neard does a "event_vis MCTrack -color=red" to create a scene graph representing the MCTracks in red, a scene graph deposited under the "dynamic scene graph". It does also a "event_vis WCDetectorPoint -color=green" to visualize the WC detector points and also an "event_plot WCDetectorPoint -modeling=neard" to have the "2D detector plot" of the event in the upper right corner of the scene view. On the first event, you should see:
For the other setups, the same logic applies; copy dedicated "startup,event,anim" .insh scripts in your app doc dir, execute the startup.insh and the event.insh at "next event".
As explained in the "softinex/Apps general behaviour" section, a "next event" can be triggered from the next event item in the main GUI panel, or from the next event button at the left in the camera menu panel (the one with blue "tracks" going out of a "vertex"). (See also MEMPHYS_vis or pmx demos on YouTube for that).
Note that as your doc dir is going to be a place for customization, it is advised to have a local git (or something) repository here to handle your startup, event and anim insh scripts.