WARNING, WARNING, WARNING : in general the softinex apps exploit intensively GL-ES, you must put in high priority to run on a local machine. For example running remotely by displaying on a local X11 server works, but you are going to loose a lot of reactivity, and we remember that reactivity is a corner stone of a good interactive experience.
All our apps behave in the same way.
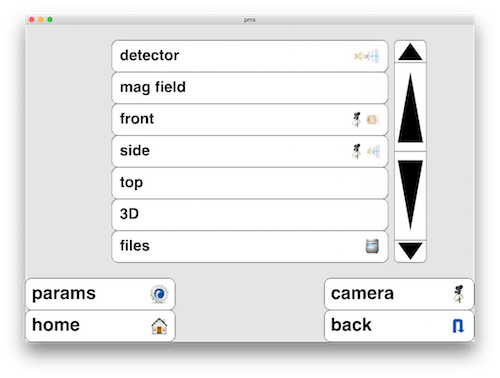
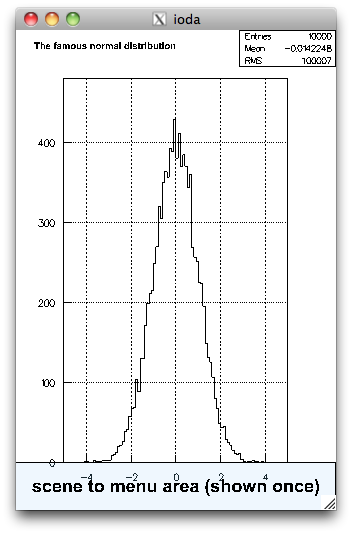
At startup a simple graphical interface (GUI in the following) appears. It is composed of the params and home buttons at the bottom left, the camera and back buttons at the bottom right, and a central list of buttons. Simply touch (click on a desktop) a button to navigate in the GUI. In general a button leads to sub lists that finishes with "leaves buttons" that permit to visualize something. For example in ioda :
examples -> h/rand
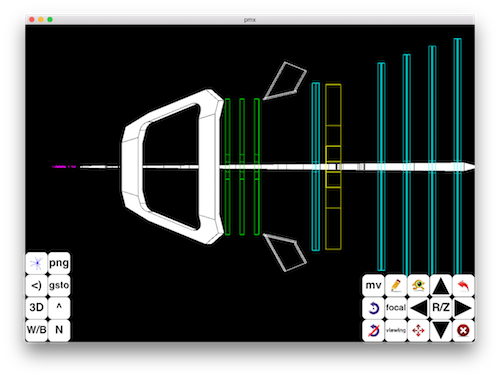
leads to the plot of the normal distribution, or in pmx :
detector -> default
leads to the visualisation of the LHCb detector.
The home button permits to return to the top list of buttons whilst the back button returns to the previous list.
When visualizing something, the GUI disappears to let the place, full screen, to the "scene". A non visible "meta zone" exists at the bottom that permits, when touched (clicked on a desktop), to map again the GUI.
Moving the camera
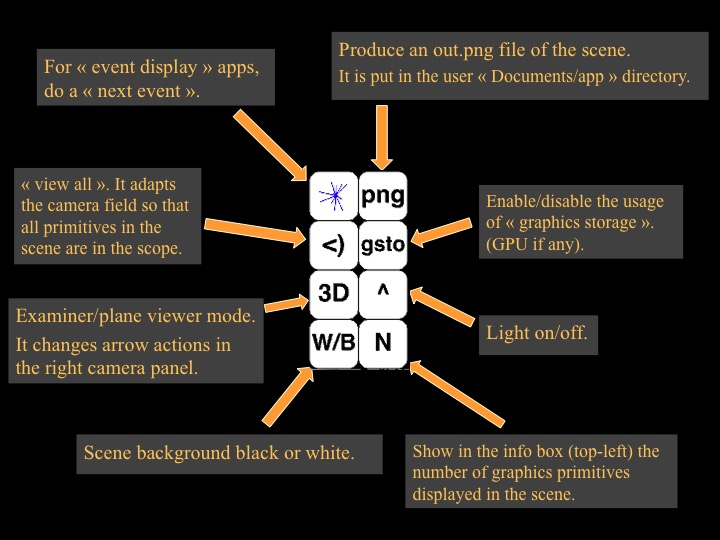
When having a scene, the camera button permits to map a panel with groups of buttons at the bottom left and right that let you move around the camera (buttons at right) or switch on/off the light (^ button at left), or do a "view all" (">" button at left) on the scene.
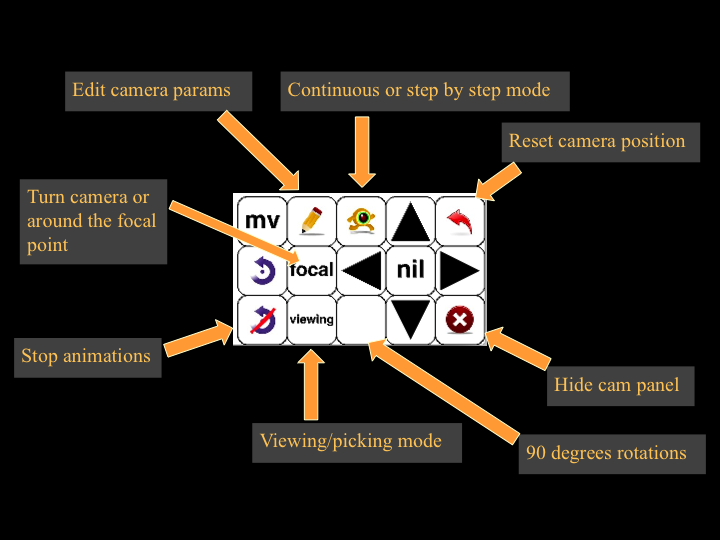
The right camera panel box :
and the left camera panel box :
The behaviour of the camera panel arrows depend if the viewer is a 2D one (plane viewer) or a 3D one (examiner viewer), a mode that can be toggled with the 2D/3D button on the left. The central button ("nil" in the upper image) shows a label that depends of what the arrows are going to do. Note that by default, a continous movement is done when activating an arrow, a movement that can be stopped by clicking again on the same arrow.
If in plane viewer mode (for exa if viewing 1D histos with ioda) :
- center P + left/right : pane left/right.
- center P + top/down : pane top/down.
- center P/Z + top/down : zoom in/out.
If in examiner viewer mode (for exa with pmx/detector/default) :
- center R/Z + left/right : rotate camera left/right.
- center R/Z + top/down : zoom by changing camera height (if ortho) or height_angle in case of perspective.
- center P + left/right : pane left/right.
- center P + top/down : pane up/down.
- center R/RX + left/right : rotate camera left/right.
- center R/RX + top/down : rotate around a horizontal axis parallel to the camera viewing plane.
- center R/FB + left/right : rotate camera left/right.
- center R/FB + top/down : go forward/backward. In case of perspective it permits also to zoom.
If the "90 degrees" button is set, left/right arrows rotates the camera by 90 degrees around the y axis, and the up/down arrows rotates 90 degrees around the x axis.
On smart devices, when no camera panel is mapped (and then being full screen on the scene), you can move the camera with a paning gesture. If available, pinching issues a zoom and a rotation gesture rotates the camera in the viewing plane.
Popup menus
When having a scene, you can use the "picking mode" to have popups and do actions. You switch from "viewing mode" to "picking mode" with the "viewing/picking" button in the right camera panel box.
Background popup menu
If you do not pick an object, the background popup will appear. It permits, for example, to change the background color with the "set color" menu item. The first menu item "cancel" permits to hide the background popup menu. At right of the popup menu, there are up and down arrows to navigate in the popup.
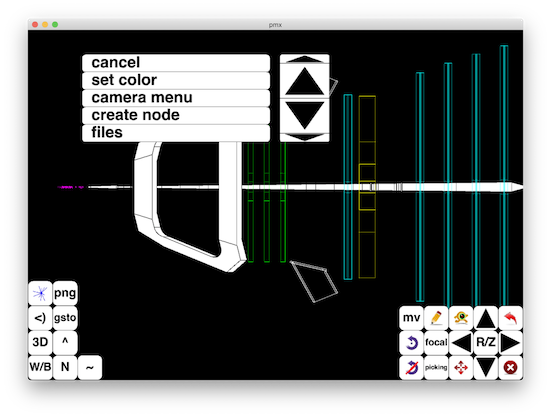
In this popup, you can find items to clear static and dynamic scenes, switch on or off light, etc...
Object popup menu
If you pick an object, a dedicated popup menu will appear. The first item shows the class of the object. If you activate this item, it will hide this object popup menu. At right of the popup menu, there are up and down arrows to navigate in the popup. In the below picture, we show the popup appearing when picking the LHCb magnet in the pmx application. Here the class of the object is "inlib::rroot::geo", which is a inlib::sg::node visualizing a ROOT geometry object found in the lhcbfull.root file.
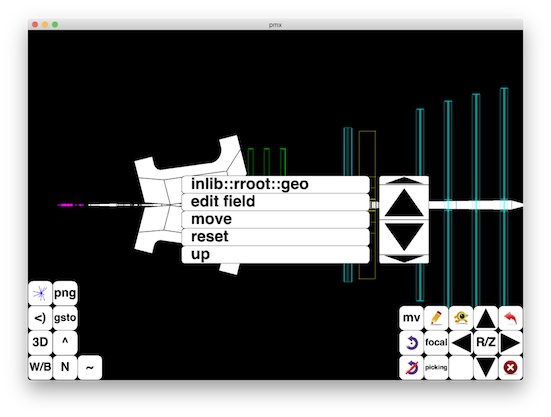
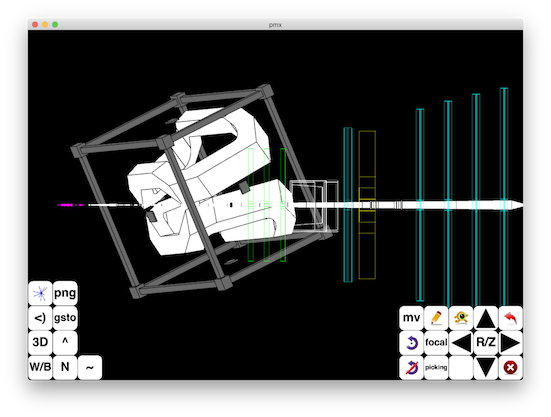
This "move" popup menu item permits to instrument the object with a "dragging cube". By "touch/click and move" one edge of the cube, you can rotate the object. By "touch/click and move" a "center face pad", you can translate the object. By "touch/click and move" a corner, you can scale the object. By activating "object popup/reset", you will reset the object to its "pre dragging" position. By picking again the object, and choosing again "move", you will hide the dragging cube.
A very usefull item is "center". When activated it will align the camera in the picked direction. When done, the picked point in the object is going to be at the center of scene.
The "edit field" permits to edit a inlib::sg::field of a inlib::sg::node. For example if picking a inlib::sg::cube, the fields "inlib::sg::cube.[width,height,depth]" are going to be listed. When choosing one, a dedicated panel will appear that will permit you to change its value. See the code of a given inlib::sg::node to see its fields. For example for a inlib::sg::cube, the fields are "sf<float>", that looks like :
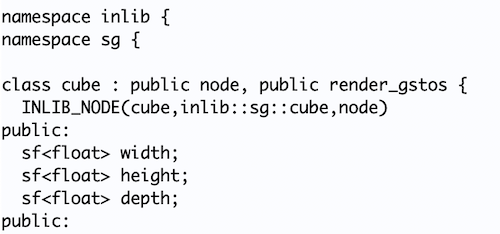
For the moment, we do not have a web exhaustive reference manual for the fields of nodes.
If in the scene graph, there is a inlib::sg::rgba node before the object, the "color" item will permit you to change the object color. In the same spirit, if there is an inlib::sg::infos node, the "infos" menu item will show the infos strings deposited in this node.
The last "delete" item will permit you to remove the picked object from the scene graph. But take care, there is no "undo" mechanism for the moment for this action.
Command line options
When starting an app from a command line by giving the binary, you can change the size of the window with the options :
  -ww=<window width>  : if -wh is not given, wh is computed to have a A4 landscape ratio.
  -wh=<window height> : if -ww is not given, ww is computed to have a A4 landscape ratio.
  -portrait           : if needed, swap ww and wh to be in portrait mode.
  -land               : if needed, swap ww and wh to be in landscape mode.
On X11, you have the options :
  -full_screen        : to be full screen.
  -no_decos           : to remove window decorations.
png/jpeg output
With the export menu item, you can produce png, jpeg file of the current scene. The output file (out.png, out.jpg) is deposited in the document directory of the application.